Saturday, November 15, 2008

A Good Work Day

Above is a nice shot I took today of the variegated Japanese sedge (Carex oshimensis 'Evergold') that we have planted throughout our fern & moss garden for color and texture. This sedge is hardy to zone 5 but seems to make it thru our winters fine with adequate snow cover (not a problem in recent winters!). Below is another clumping sedge called brome-like sedge (Carex bromoides) that we planted years ago and I've really liked it's low maintenance and textural contribution in part shade. This sedge is native to a wide range of the United States (including WI) and Canada.
This morning was our last work day of the year. Marianne and Janice lead a crew of about 10 volunteers out in the gardens. The task was putting lights on all the white pine trees that we cut on Monday, set up on stakes and will use as temporary decorations. The weather was brisk and windy but at least not rainy. Thanks to the ladies for their help and thanks to Luis, Terri, Kay, Maggie, Lynn, Steve, Jody, Marcus, Chris and a young fellow from UW-Whitewater. Larry also was out putting up lights and I ran more cords. There is light at the end of the tunnel.


It wont be long before holiday trees go up in our homes. The debate about the pros and cons of "real" versus "fake" will continue in perpetuity. There is another option; the use of a live tree. This involves bringing in a live tree for a couple of days and then planting it outside after the holidays. There are some tricks to accomplishing this task but there are some garden center and nurseries that will sell containerized or balled & burlapped conifers for this use. See the article I wrote below regarding this option. At the bottom is a recent picture of the blue wood sedge (Carex laxiculmis 'Bunny Blue') that while marginally hardy, has overwintered here and looks great.


This December, it is estimated that over 33 million real Christmas trees and 60 million artificial trees will be decorated in the United States. After the holidays, these trees are either boxed up or dragged to the curb line for disposal. Why not take your Christmas tree out into the yard and plant it? Your investment then goes into the landscape and the sentimental value is there for years of enjoyment.
Live Christmas trees are evergreens that are still in containers or have their roots balled and burlapped. More garden centers and nurseries are starting to offer these live trees in December although they are traditionally more expensive than cut Christmas trees at that time. Typical varieties include Scotch pine, white pine, blue spruce and Douglas fir, although many other species may be available. Brought into the home for a brief time to be decorated and enjoyed, they are then planted out in the landscape. These live trees can be successfully established in the landscape by following some simple rules of thumb.
If you are serious about utilizing a live Christmas tree and have located a nursery that offers them, get out into the yard and dig the hole now before the ground is frozen. Remember that these trees will get quite large so place them accordingly. The north side of the home is ideal for a large evergreen as it acts as a windbreak in the winter and doesn’t cast unwanted shade at that time. The size of the hole should be roughly the depth of the root ball or container and three to five times the width. Ask the nursery for rough dimensions of their root balls or containers or measure yours if you have already obtained a tree. Keep the soil that you dug out of the hole from freezing by keeping it in wheelbarrows in the garage or covering it with mulch outside. Cover the planting hole with plywood or line it with straw to avoid any accidents.
When looking for live Christmas trees, select one with a nice shape and a good-sized root ball or container. Make sure that you select a tree that you like and can visualize as a component of your present and future landscaping. Survival guarantees are typically not offered for these trees due to the intricacies of proper planting procedures at that time of year. Remember that these trees will be very heavy when you take into account the weight of the damp soil around the roots. After selecting a tree and getting it home, you must keep the tree dormant but also keep the roots from freezing. Typically an unheated garage or shed is sufficient for this acclimation period which should typically be at least two days. Keep the roots watered at this time.
There is a very narrow window for utilizing a live Christmas tree in the home as indoor temperatures will start to bring the tree out of dormancy and encourage growth. This translates into severe winter damage when planted outside. These trees must remain dormant and should only be inside for 3-5 days. Ideally, bring the tree in on Christmas Eve day, decorate it and then plant it on Christmas day after removing decorations. Never keep the tree inside for more than a week as its chance of survival when planted outside will decrease significantly. While inside, keep the root ball in a pan or tub with water. Putting ice cubes around the base of the roots will help keep the roots cool while providing water. Check water daily. Keep the tree away from heat sources such as fireplaces, vents, registers and direct sun. Try to locate the tree in the coolest part of the room. The needles can be sprayed with an antidessicant spray to help prevent premature needle loss. If you use lights on the tree, use “cool lights” as some lights will emit unwanted heat around this dormant tree.
After Christmas, remove decorations and take the tree back to an unheated garage or shed for two days of acclimation before planting. Bringing the tree directly outdoors could result in damage from severe temperature extremes. Plant the tree on a mild winter day, making sure to remove ropes, nails, containers or other material from the root area. Make sure to plant the tree an inch or two higher than grade because of settling and then backfill with the original soil. Stake the tree if necessary. Water with warm water and don’t add any fertilizer at this time. Mulch the area around the base of the roots with 12” of woodchips or other mulch to keep the soil from freezing too quickly. Keep watered until the ground is frozen. In spring, decrease mulch depth to 4” and continue to keep watered as needed.
It seems like a lot of work to locate, obtain, maintain and establish a live Christmas tree. It is. However, imagine the year 2040 when your progeny is playing around a 40 foot tall pine tree in the back yard and you can say, “Ah…that Christmas of 2008…I remember when….”

Friday, November 14, 2008

Our Last Mild Friday?

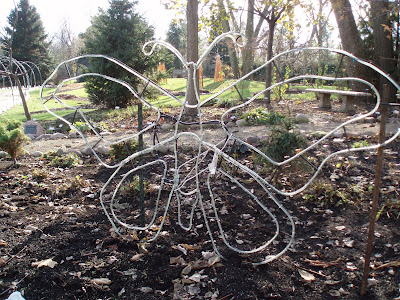
The weather was awesome today. We had some clouds but also periods of sunshine and the temperatures were in the mid 40s; quite comfortable for a mid-Nov. in Wisconsin. Above is just one of many locations out in the gardens where our "network of power" is utilized for the Holiday Lights Show. It's interesting that when our lights show started 12 years ago, power was plentiful but labor to put up the show was scarce. Now we have the reverse. We have really "cranked" on putting this show up. We started in mid-October and the grounds staff (particularly Marv, Marianne, Terry, Larry and I) have been setting things up outside. We have many "rebar displays" like those to the left. These all have rope lighting and represent flowers, creatures and other thematic elements. These were all designed and created by a talented volunteer from nearby Brodhead, WI. We're fortunate to have Janice and Jerry continuing to garden for the most part as that is still quite important. Now we're always worried about power problems (particularly during wet weather). We hope that it's cold enough for snow as rain is the bane of our event. We should have the show up by next Wed. and tested the following week.

Janice and Kristine continued to work on cutting back perennials and raking leaves. Janice asked me to mention in this blog that she raked ALL DAY (although she also weeded and took extra long breaks). Marianne, Terry, Marv and I worked on the lights show although Marianne spent some time weeding the new iris beds as well. Rick and Tony worked on leveling rocks along our paths and were clearing European buckthorn from around the perimeter of our Horticulture Center. Dr. Gredler did some mowing and accomplished two milestones today; his 200th trip to the dump with debris and his 800th volunteer hour for the year. He's one of our best.


As many of our ornamental grasses go dormant and transform in to ambers and browns, our sedges (Carex sp.) will still maintain color throughout the winter (if visible). Many sedges are "semi-evergreen" and while dormant, still show color until new growth emerges in spring from the basal foliage (which overwinters). The plantain-leaf sedge (Carex plantaginea) to the right looked great today with its wide ribbon-like foliage. Found in moist woodlands from Canada to Alabama, this native (not to WI) sedge has a lot of merit in my mind. We have planted throughout our dappled shade areas. It is a hardy (to zone 4) clumping sedge and we will continue to utilize its merits and that of other clumping sedges. Avoid "running" sedges!!!

Thursday, November 13, 2008

The Rain Held Off!

The image above is explained below. With a threat of rain later today, we were blessed with warm temperatures and some sunlight of all things. It's clouding up at 2 pm now but I think we'll escape with a full day of work under our belts. The Grumpies had a great day although work out in the garden is becoming more sparse. They hauled decorations over to the visitors center and did myriad tasks around the horticulture center. The carpenters will be busy thru the winter and there are some nice indoor projects starting to materialize. Marianne volunteered today and worked on the lights show all day (as did I). Larry helped put up lights and ran many extension cords. Jerry and Janice did some gardening and Rick and Tony bounced between various projects. Dr. Gredler did some of our last mowing and we're starting to prepare for winter by stockpiling salt and getting snowblowers ready.


The picture above is of produce that we grew back in 2007 at the gardens. We had an heirloom collection of tomatoes, garden peppers and eggplants. This collection was maintained by Master Gardeners and the bulk of the produce was donated to area food banks. Gardening with heirlooms and growing your own food continues to become increasingly popular each year. For next year (our 20th anniversary incidentally), we'll be displaying 100 varieties of heirloom tomatoes, 25 varieties of heirloom bell peppers, 25 varieties of hot peppers, 25 varieties of basil and 25 varieties of heirloom beans and/or peas. We will offer most of these varieties as plants during our spring plant sale in May. This is our fourth year of growing vegetables and visitor interest continues to increase. Master Gardeners will play a major role in maintaining and promoting this collection and I'm relying heavily on Janice and Kristine this winter. The fun part will be picking the varieties as the seed catalogs arrive.


I've decided as the weather gets more sour, I wont try to keep up with daily photos (unless relevant) but will toss some nice images (see below) to carry over some color until spring. For those that read this blog, don't hesitate to make any comments or post questions. The intent of this blog is to not only catalog what is going on at the gardens but also to entice potential new visitors so pass along the link and let's get more supporters.

Wednesday, November 12, 2008

Dampness

Nice shot of the Russian cypress (Microbiota decussata) above. This plant can tolerate part shade and will get 12" tall and continue to spread. Originally touted for shade, it prefers some sunlight and requires perfect drainage. Our best specimens are in tough soils, part shade and perfect drainage. It will die quickly in damp areas. This time of year, it also turns a nice bronzy/plum color.

It fluctuated between a light drizzle, heavy drizzle, steady rain and mist today. It never really didn't rain and it never was a downpour. For those of us that went outside (Marv, Terry, Rick, Tony and Jerry), we were all saturated pretty quickly. I managed to run cords most of the day while Marv and Terry set up displays and decorated with lights. Rick and Tony hauled debris, graveled a path and did various odds and ends. Jerry continues to prune and cut back shrubs. Larry went home sick and Marianne was the smart one and stayed inside to work on repairing lights and prepping displays. We're making lots of progress although we still have gardening to accomplish. Rick and Tony will finish next week with the remainder of the garden staff departing the week following (and returning in April 2009).

See below for one of many ways to kill a tree. I can't imagine the roots are pretty happy under all of that asphalt. Consider mulching your tree with 3-4" of woodchips or shredded bark this fall. Taper the mulch away from the base of the tree and understand you'll have to add (topdress) this mulch layer with 1" of fresh stuff every year. Studies have shown that properly mulched trees grow significantly faster than their counterparts growing directly out of turf (competition). Winter is a good time to examine your trees and shrubs for architectural pruning and shaping although know your plant as many prefer to be pruned after flowering (lilacs, etc.).

Consider the value of ornamental berries in the landscape as you examine your landscape. Ornamental berries can offer colorful interest and may also have significant wildlife value. See the article below.

As you enjoy wonderful foods during the cold holiday months of November, December and January, look out in your landscape and realize that wildlife is also looking for food; and perhaps having some difficulty. Many birds and mammals will forage for food through the coldest months of the year. The severity of the winter coupled with limited food supplies can be the difference between life and death for our neighborhood wildlife. Wildlife-friendly gardens should provide food for wildlife through the toughest winter months. While bird feeders, bird houses, nesting boxes and heated bird baths are all helpful, try planting native trees and shrubs that have persistent berries. These food sources will become vital to wildlife in our coldest months.

Landscapes that are friendly to wildlife will contain elements that provide good nesting sites, winter shelter, places to hide from predators and natural food supplies that last throughout the year. Trees and shrubs with winter fruit are those whose fruits remain attached to the plants long after they become ripe in the fall. Many of these berries are not palatable until they have frozen and thawed many times. The National Wildlife Federation has dubbed these plants the “spinach plants” for wildlife. This indicates that while they may be the last food selected by wildlife due to this “transformation of palatability”, their nutrient value at a tough time is vital. It is important to note that some birds never eat seeds and these berries become very important for many resident bird species in late winter and early spring. Small mammals will also utilize these berries as well as available nuts from trees such as oaks, hickories, buckeyes, chestnuts, butternuts, walnuts and hazels. Long-lasting berries can be the life saver for wildlife during tough winters.

There are many plants native to North America that will provide winter berries for our wildlife and also be ornamental throughout the year. Utilize native plants whenever possible if your goal is to attract wildlife. It is interesting to note that native plants will attract forty times more wildlife than non-native plants. Something interesting to note is that while some non-native trees and shrubs do provide berries for wildlife, they are horribly invasive as the seeds are distributed throughout our native ecosystems. Some examples include European Buckthorn, Japanese Barberry, Tatarian Honeysuckle and Russian Olive to name a few. See the accompanying chart for twenty-five great native plants for persistent winter berries. When incorporating these trees and shrubs into your landscape, strive for a variety of plant heights and plant densities. Berries should be provided at all levels and can be done so by utilizing both trees and shrubs. Diverse plantings will be more attractive to a broader range of wildlife.

As you enjoy the winter landscape, notice plants around your neighborhood and parks that are providing berries for wildlife. These fruits can also be quite ornamental and improved varieties of these native species, while still providing wildlife benefits, can easily be incorporated into both formal and informal landscapes. Contact the National Wildlife Federation (1-800-822-9919) for more information on wildlife-friendly landscaping. Including native trees and shrubs that provide essential winter berries will help wildlife through our Wisconsin winters.

Tuesday, November 11, 2008

Walking In A "Pseudo" Winter Wonderland....


Today was quite cool but the precipitation held off until after lunch. We had a productive morning and continued working outside as it's becoming "crunch time" for finalizing this Holiday Lights Show. The drizzle was mostly rain with hints of snow and sleet. The picture above is of the purple moor grass (Molinia caerulea subsp. arundinacea 'Skyracer') that we have throughout the gardens (November photo). It has a nice orange-yellow fall color although it does not stand up to snow and ice and will not be of any winter interest. The plumes you see are from a grass further behind these three specimens. It's usually flattened by early December. However, this is a nice tall grass that has the bulk of it's foliage below 3' tall and then sends up wispy flower stalks to 7' tall (total). This grass is termed a "transparent" grass as you can still see thru it (there is actually another variety of this grass called 'Transparent'!). We use it as a barrier but not a screen. It is nice in combination with other perennials as well (see below-look behind purple coneflower!). See the picture at the bottom for an idea of ornamental grasses used successfully in the landscape.
The moisture didn't stop Marv & Marianne (volunteering) from helping with the lights show while Janice worked with Heidi and Barb out in the garden as we finish the last of our bulb planting and clean-up. Larry and I worked on cords while Rick and Tony cleaned up debris and helped with show set-up as well. Bill and Dr. Gredler were also around to help in the gardens. I small, damp crew but we accomplished a lot on what I thought would be a "rain/snow out"! The ground isn't frozen yet so head out and get some discounted bulbs this weekend and get them in the ground. A nice way to incorporate multiple types of bulbs in the same hole is called "bulb lasagne". This is a great way to segway color, particularly in a small space. See the article below for some ideas.
This article refers not to a recipe with an “edible result” but a gardening technique that will result in a “feast for the eyes” next spring. This planting approach, also called bulb layering, will maximize the spring color impact of your bulb plantings by allowing you to fill your planting hole with multiple varieties of bulbs.

With cooler temperatures affecting our waning gardens, fall tasks will include leaf collection, mulching and ideally, bulb planting as well. October is the time to start planting spring blooming bulbs in the soil. Bulbs can be safely planted as long as you can still work the soil. Garden Centers abound right now with many bulb choices for your spring garden, whether it’s daffodils, tulips, hyacinths, ornamental onions (Allium) or some other hardy and/or rare selection.

While the results of your labor will be appreciated 5-7 months from now, why not consider a “bulb sandwiching” system that combines different types of bulbs and makes the most out of a small garden space? It’s useful and effective to plant bulbs in tandem with other bulbs and perennials to create sequential color and exciting combinations. Smaller gardens will benefit greatly from this approach.

When considering a space for bulb planting, envision your planting hole as a space to accommodate three levels of bulbs that may bloom together or have a staggered appeal. Dig wide holes 12” down and incorporate some coarse sand, compost and a sprinkle of Milorganite fertilizer in to a layer of loose soil at the bottom of this hole. Then plant larger bulbs such as daffodils, large alliums or camassia in this lower level with the bottoms of the bulbs resting at roughly 9” depth. Add loose soil until just over the tips of those bulbs, then “nestle” in bulbs such as tulips and hyacinths at 5-6” planting depth with again, the installation of another covering of loose soil. The remaining 3” of your hole can be filled with smaller bulbs such as Siberian squill, grape hyacinth, snowdrops, crocus or other smaller bulbs that can be planted 2-3” under the soil level. Fill the hole and sprinkle Milorganite on top as a light fertilizer and rodent deterrent (“anti-digging”). It is vital that the filled hole is watered well but also has excellent drainage.

This “bulb lasagne”, with all its layers, will showcase a wide range of plants in a small space. Deeper planted bulbs will find their way to the surface around the other bulbs planted around them. Depending on your bulb selection, you should see reliable spring colors as your planting hole explodes with a wide range of wonderful spring plants. Bulb layering can also be done with just two levels. Consider the bloom times of your selections and consider a staggered approach. Perhaps your planting hole shows wonderful snowdrops in April, followed by early tulips in May and a final transition to ornamental onions (Allium) in early June. Or perhaps your planting approach seeks to combine plants with the same bloom times.

A final touch to your bulb lasagne could be a perennial plant above the bulbs, installed at ground level. Overplanting the space with an appropriate perennial will allow that perennial to dominate the space (as it fills in) after you have already enjoyed color from your bulb layering approach. This space could have been wasted in terms of color if you were simply waiting until late May for the perennial to fill out. Incorporate color early and often by utilizing the wide gamut of spring blooming bulbs that are available to you as you read this article. Consider following the easy recipe for the delectable Bulb Lasagne!

Monday, November 10, 2008

Tree Cutting Expedition

This morning was our 10th Annual Tree Cutting Expedition. A local tree farm donates close to 200 trees every year for our Holiday Lights Show. We get a caravan of trucks, trailers and volunteers and head 40 minutes or so to the tree farm. As Larry cuts them, we load them up, secure them, drive them back and place them out in the gardens. The intent is to stake them up temporarily as small evergreens (6-9' tall) that we then put lights on. Having hundreds of these out thru the gardens is a nice touch and they are easier to decorate with lights than the taller trees. We have a good portion of our lights show up already and I'm immersed in the arduous task of running power out to everything. It was a productive day and while the group above (Rollie, Andy, Dick H., Kurt, Rick, Tony, Larry, Dick P., Bob A., Bob T., Ron, Dick K., Jim, Vern, Terry) was a great team, Marv, Marianne, Jerry, Urban, Dr. Gredler and Gene hung back to work on gardening and more lights show related tasks. It was chilly but the sun shone most of the day.
To the left is a nice specimen of the weeping Alaskan cedar (Chamaecyparis nootkatensis 'Pendula') near our gazebo garden. This specimen is a real eye catcher and looks good every day of the year. There is a nice variety of this same species called 'Green Arrow' that is very, very narrow but with the same droopy look. The variety 'Van den Aker' is supposedly the most narrow and is certainly a focal point in the garden. We have a golden version of this species as well although the variety name eludes me right now.

Friday, November 7, 2008

The Touch Of Winter Has Arrived!

As I type at 1pm today, it's sleeting outside with the occasional snowflake blowing by the window. The day started sunny and cool but we were able to accomplish lots of lights work outside (Terry, Marv and myself). Dr. Gredler mowed/shredded leaves and both Tony and Rick kept busy hauling debris all day. Marianne and Janice worked on organizing our remaining lights, decorated obelisks and began much needed repairs on our growing pile of lights strands that have "issues". The image above is of the native little bluestem (Schizachyrium scoparium) that gets a nice reddish-maroon fall color. Ornamental grasses really have major impact in the landscape this time of year as they provide color, texture and visual interest. Examine your winter landscape where ornamental grasses, left up over the winter, can be effective as screens or simply to be enjoyed. There are many options for hardy, perennial grasses. However, consider the use of native grasses as they are quite adaptable in our climate and are favored by our native wildlife as a food source. At the bottom of this blog is an article on native ornamental grasses I wrote last year. Below is another little bluestem although this is the variety 'The Blues' which has a more intense, sky-blue coloration in summer and seems to have superior fall color as well.
The view of our November landscapes encompasses the transition from the fading blooms of late summer and vivid fall colors to a landscape of faded greens, tans and browns. While color may lack in our gardens this time of year, texture and form come to the forefront. Ornamental grasses in the garden, while contributing as role players through the growing season, become very important in anchoring our compositions, providing visual interest and perhaps helping our native wildlife as well. There are many hardy, ornamental grasses to choose from but why not consider some tried and true native grasses that will accent and improve your landscape?

Much of central North America was originally covered with tallgrass prairie. This important ecosystem fostered many important plant and animal species. However, most of the original tallgrass prairie (90%) has been lost to agriculture and other land uses. Fortunately, the prairie contains many wonderful grasses that are now making a “comeback” in our gardens. Many of these native species have had special cultivars selected and propagated for improved ornamental attributes. Keeping in mind that these native grasses are very adaptable in our climates, tolerant of our soil types and will attract 40 times more wildlife (primarily birds) than non-native ornamental grasses, perhaps they are worthy of our consideration in the back yard.

All of the grasses listed below prefer full sun conditions but will take a wide range of soils. Leave these grasses in the garden for winter interest and cut them back to 3-4” by early April before new growth resumes with the warming of the soil. Mulching around the grasses will help minimize weed competition and retain moisture. In time, these grasses may require division; a process of digging up the grass and separating out the most vigorous sections for replanting or relocation. Research these grasses prior to purchasing them and view your winter garden for gaps that can be addressed with these exciting, long-lived, native perennials.

Our big bluestem (Andropogon gerardii) is a robust native grass that forms a sturdy 6’ tall clump and may have some reddish tint to the leaves in autumn. Look for the varieties ‘Silver Sunrise’ and ‘Pawnee’ for improved fall color. Another tall prairie native is Indian grass (Sorghastrum nutans). This 5-7’ tall clumping grass has a rough texture and upright, arching form. Fall color is typically a yellow or gold. The Indian grass varieties ‘Sioux Blue’, ‘Indian Steel’ and ‘Bluebird’ are noted for their metallic blue foliage and strong, bold, upright appearance.

Another medium to large native grass is switchgrass (Panicum virgatum). This grass has experienced lots of selection and breeding, particularly in Europe. Dozens of varieties exist and are being developed for size and fall color. Switchgrass can take a little shade and you may see some reseeding in damp soils. Heights can be quite variable with some varieties in the 3-4’ range and some in the 6-7’ range. Try the shorter varieties of ‘Shenandoah’ and ‘Rotstrahlbusch’ for a nice red fall color. Taller varieties such as ‘Dallas Blues’, ‘Heavy Metal’ and ‘Prairie Sky’ are known for their bluish leaves and airy seedheads. The popular variety ‘Northwind’ was selected by Roy Diblick of Northwind Perennial Farm near Lake Geneva, WI.

If you have a location for a smaller grass, consider the use of the wispy prairie dropseed (Sporobolus heterolepis). This grass will achieve a height of 24” and is very transparent in appearance. The texture carries thru the winter as does the yellow, dormant coloration. Little bluestem (Schizachyrium scoparium) is another alternative with a mature height of 3-4’. This narrow, upright grass naturally has a blue green coloration and will get a reddish hue in fall. Consider the varieties ‘The Blues’, ‘Blaze’ and ‘Cimmaron’ for a very blue summer color with more intense fall coloration. This upright grass can be used in masses or as single specimens along a border.

Ornamental grasses, while not new to horticulture, are becoming ever more important in our “four seasons” gardens. Hardy grasses from around the world can be used in your Wisconsin back yard to create screening, accent a view, combine with other plantings or draw the eye thru the barren winter landscape. With a wide range of physical and ornamental attributes, there may be a native option for your consideration.